Sales and receipts
Before making a sale
Confirm the branch and warehouse. Cashiers need an active shift before selling. Every role needs their own active cash-drawer shift to accept customer cash. An Admin must configure eligible Fund Sources before those choices appear at checkout.
Add products
- Open Register.
- Search for the product or choose its category.
- Select the product to add it to the cart.
- Check the selling unit and quantity. Use the cart's quantity controls to change them.
- Link a customer if needed and enter any permitted discount.
- Review the subtotal, tax label, and Payable Total.
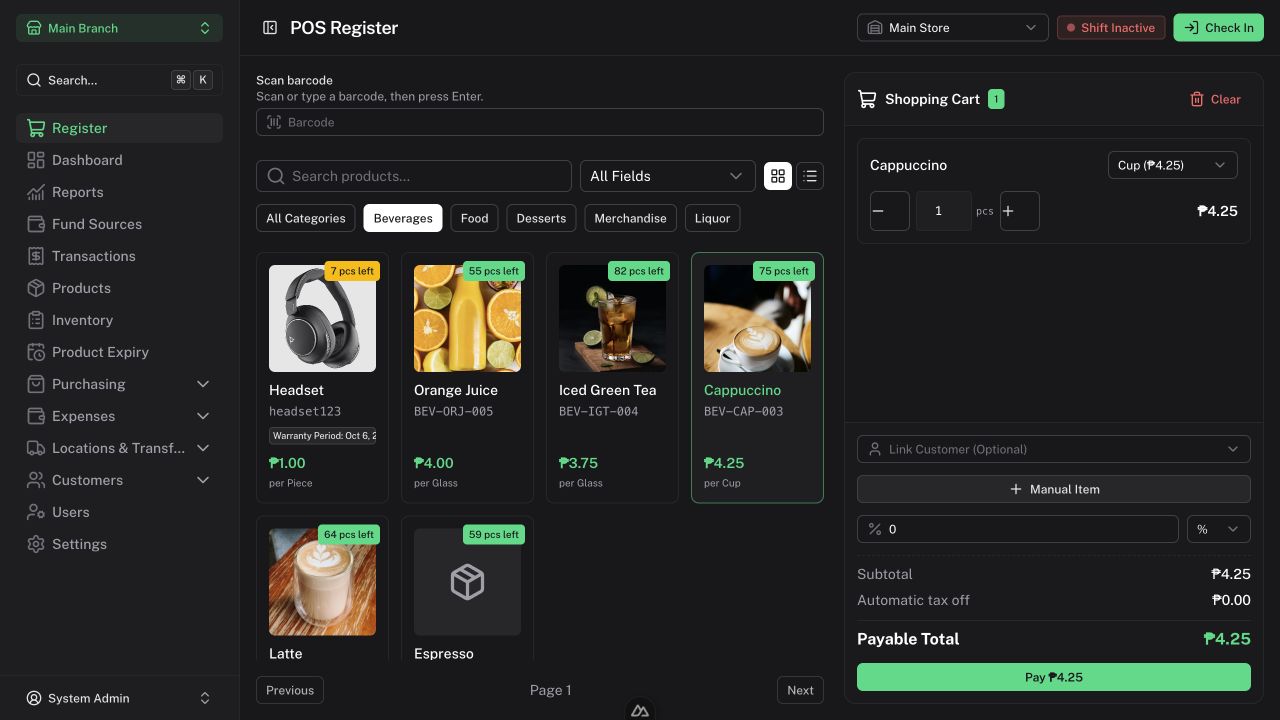
For goods sold by weight or another measured unit, enter the measured quantity in the correct unit. Count products require whole quantities; measured products can support three decimal places.
The selected UOM determines how much stock the entered quantity consumes. For example, quantity 2 with Box of 12 selected deducts 24 pieces from a piece-based product. See Units and Base UOM for examples and setup guidance.
Manual Item lets you enter a custom item and price. It does not provide a normal stocked-product trail; use a configured product for goods whose inventory you need to track.
Scan a barcode
Use a USB or Bluetooth scanner configured in keyboard mode with an Enter suffix. Focus Scan barcode, scan the item, and keep scanning. Each scan adds one unit of the matching selling unit. Repeated scans increase its cart quantity.
You can also type the barcode and press Enter. If the barcode is unrecognized, check its product/unit assignment rather than adding an unrelated product.
Take payment
- Select Pay.
- Choose Single Payment or Split Payment.
- Select the actual Fund Source used for the payment.
- For cash, enter the amount tendered and check the change.
- For split payment, allocate the total across sources and any Store Credit. The remaining amount must be covered.
- For Store Credit, select a registered customer.
- Review the total and select Complete.
- Confirm the sale result, print if needed, and start the next order.
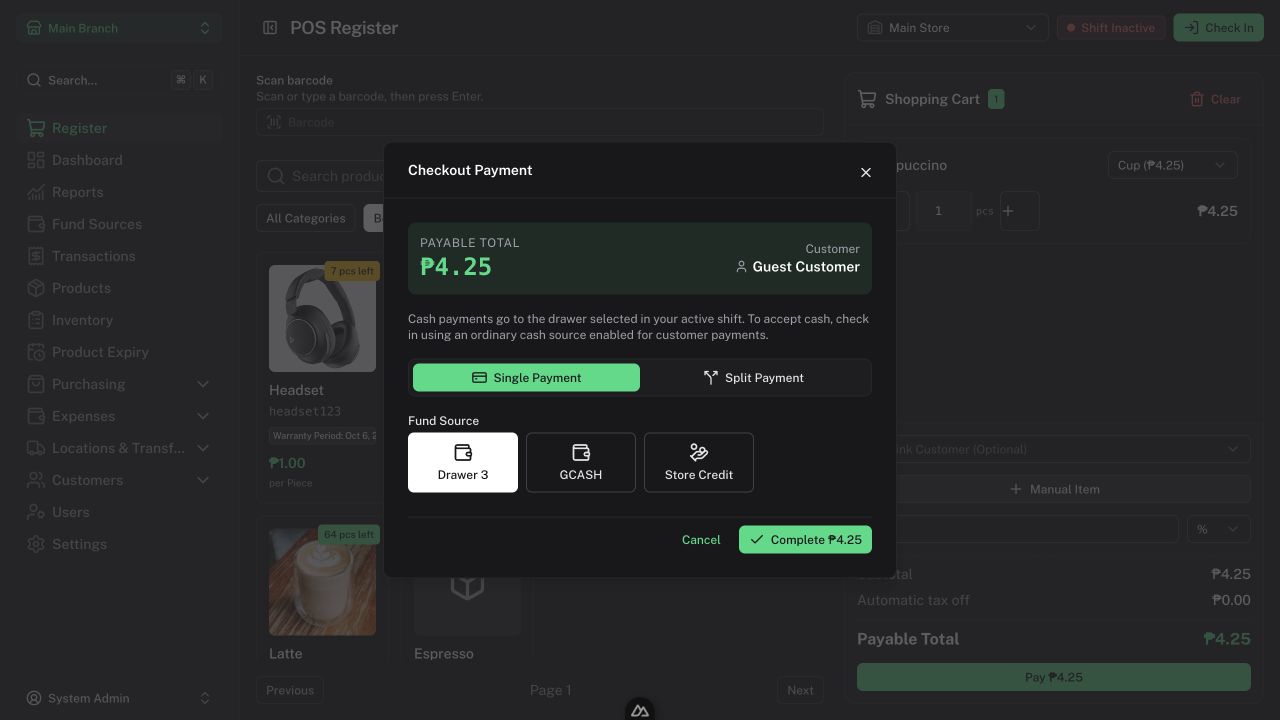
Source names differ between businesses. Cash goes to the drawer selected in your active shift; Store Credit creates debt without adding money to a source. Recording a bank or wallet payment does not itself send or collect external money.
If tax settings changed while you were preparing checkout, the app may refresh the total and ask you to reconfirm. Review the new payable amount before continuing.
Print or reprint a receipt
Use Print after checkout, or open the sale in Transactions to print again. Printing opens a PDF viewer; if a popup is blocked, the app falls back to a download.
For an 80 mm thermal receipt, select 80 mm paper, actual size/100% scaling, and no extra printer margins. Validate an actual print with your printer. Purchase orders use A4 paper.
Saved receipts use the original sale's quantities, discounts, payments, and tax policy. Refunded receipts are marked accordingly.
Refund a sale
Open the sale in Transactions, review it, and use its refund action if available. A refund restores the saved product stock layers and reverses the sale's recorded financial amounts.
- Sales older than 24 hours cannot be refunded through the current sale-refund workflow.
- Cashiers can refund only their own transactions, subject to the shift requirements.
- Dependent customer credit collections must be fully refunded before refunding the sale.
- Refunds normally use the original sources. Historical records may ask for an explicit source breakdown.
- A source must have sufficient funds for money going out.
Check Customer credit for collection refunds. Do not record a new negative sale as a substitute for the refund workflow.